Weird Mirrors in TouchDesigner
I’m doing this ‘Design for Emerging Technologies’ class, and the first big project (after teaching them how to use git!) is in TouchDesigner. This is a very intimidating piece of software that drives big visuals - immersive light installations, stage shows, etc. It’s programming visuals but with an incredibly complicated ways to transform live data. And it’s got a STEEP learning curve.
Like; this is a simple project. It’s not easy!
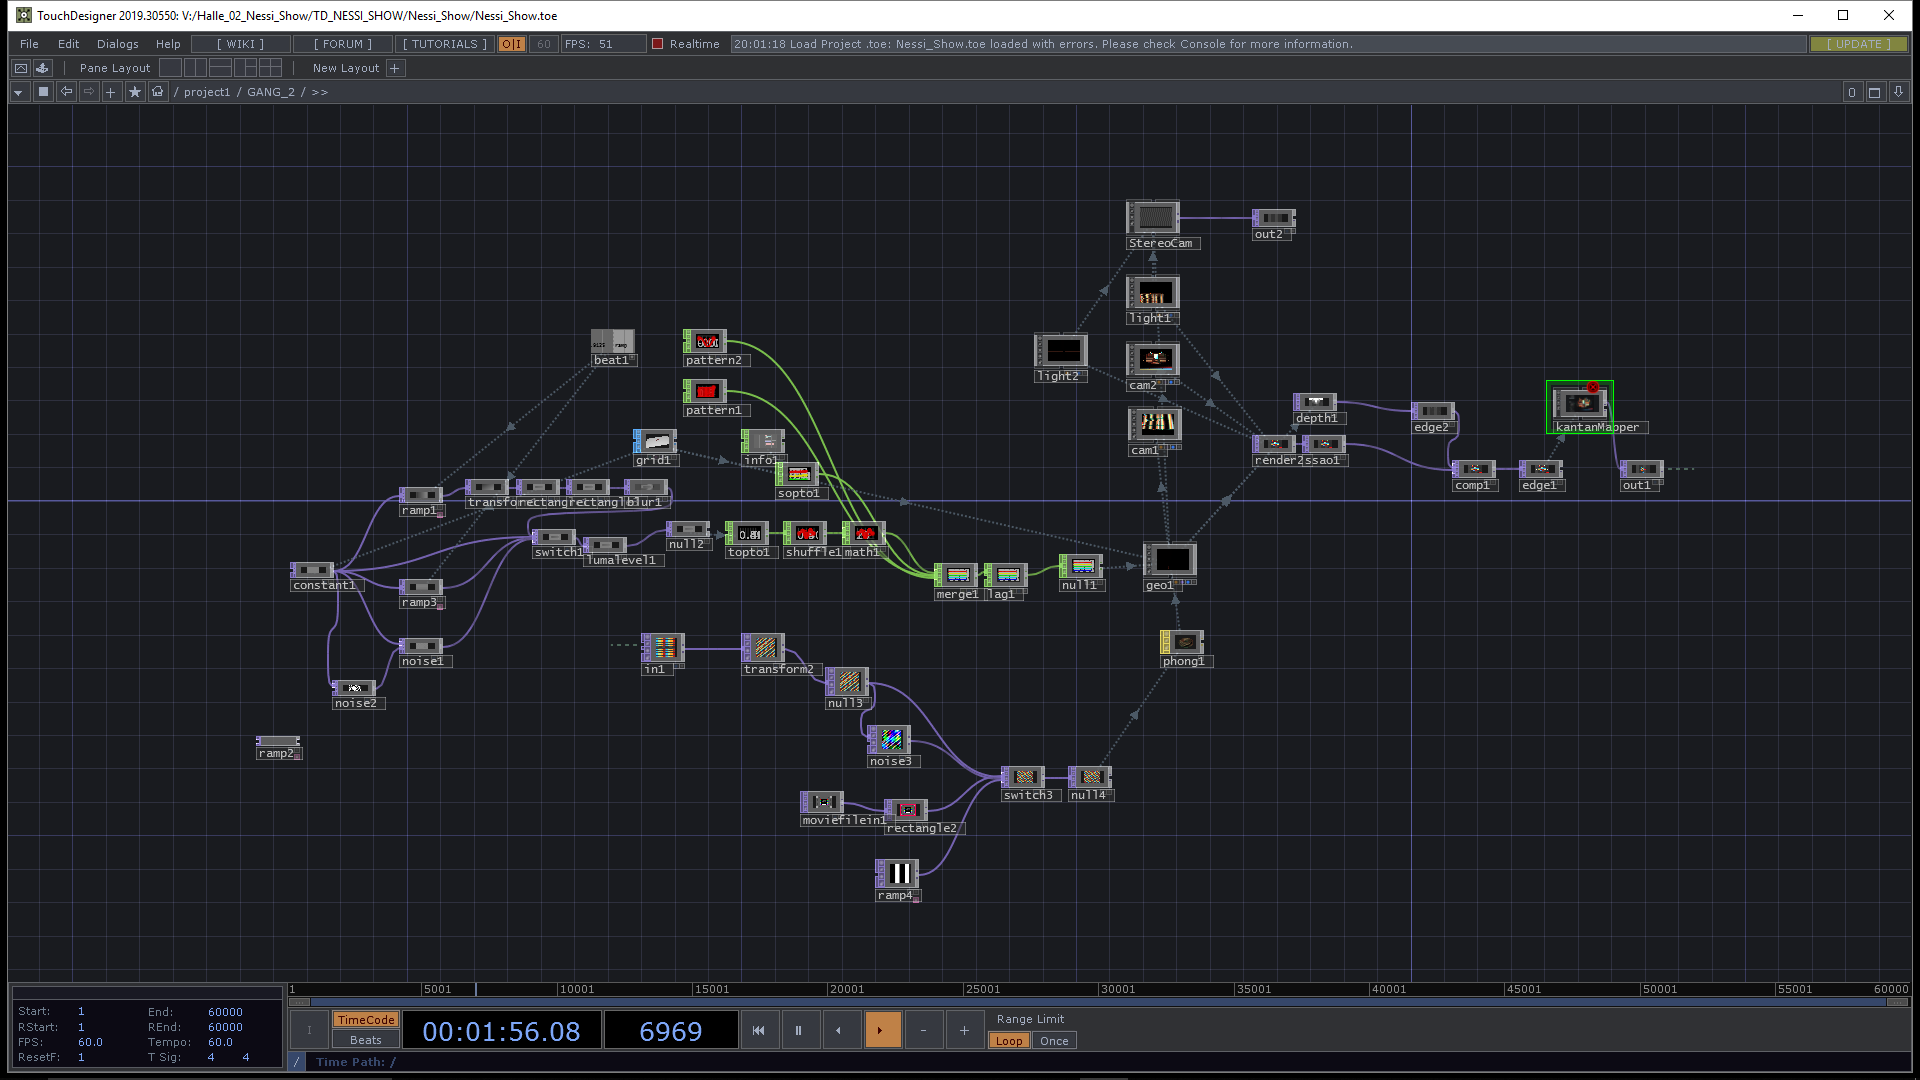
But it’s also got an MCP. Which means now our robot friends can help!
So with Claude in our pocket, the project becomes: how do you take a totally unfamiliar technlogy and apply your interaction design toolkit here? What are the affordances? What actions can a user take? What kind of feedback can you give the user?
When I was in school, we had an Elder Statesman professor who loved to harangue us that the tools of design were universal, and could be applied across disciplines. He didn’t care that we were in graphic, or industrial. He’d YELL at us: Design is Design… Design is Design is Design is Design.
So I am trying to embody that professor and incept my students with this idea. But with less shouting.
Here’s the brief I gave them, more or less:
TouchDesigner can do all kinds of complicated things and run complicated hardware. But you can run it on your laptop, and your laptop has a screen and a microphone and a webcam and a keyboard and speakers. Your job is to make a **Weird Mirror**: create something that allows a user walk up to your project, see themselves *reflected* in some way, literally or metaphorically. And take them on a journey: make the user FEEL something.
And we just wrapped the project, and it’s SO fun to see what they made!
Many stuck with a warped representation of you, on the webcam - using hand tracking to let you manipulate something on the screen, virtually. But the class got creative.
- We had a 3D-pong game you play with head tracking; your nose is the cursor.
- We had a jump scare.
- We had a bashful ghost you had to befriend by staying very still and then petting it.
- We had a lively koi pond where you could feed the fish.
- We had a climate change timeline you could control, but if you went too far forward you melted.
Here’s a few visual examples:
Sicily made a little interface where you plant a seed, which grows into a flower. When you smile the sun shines; your hands can create snow.
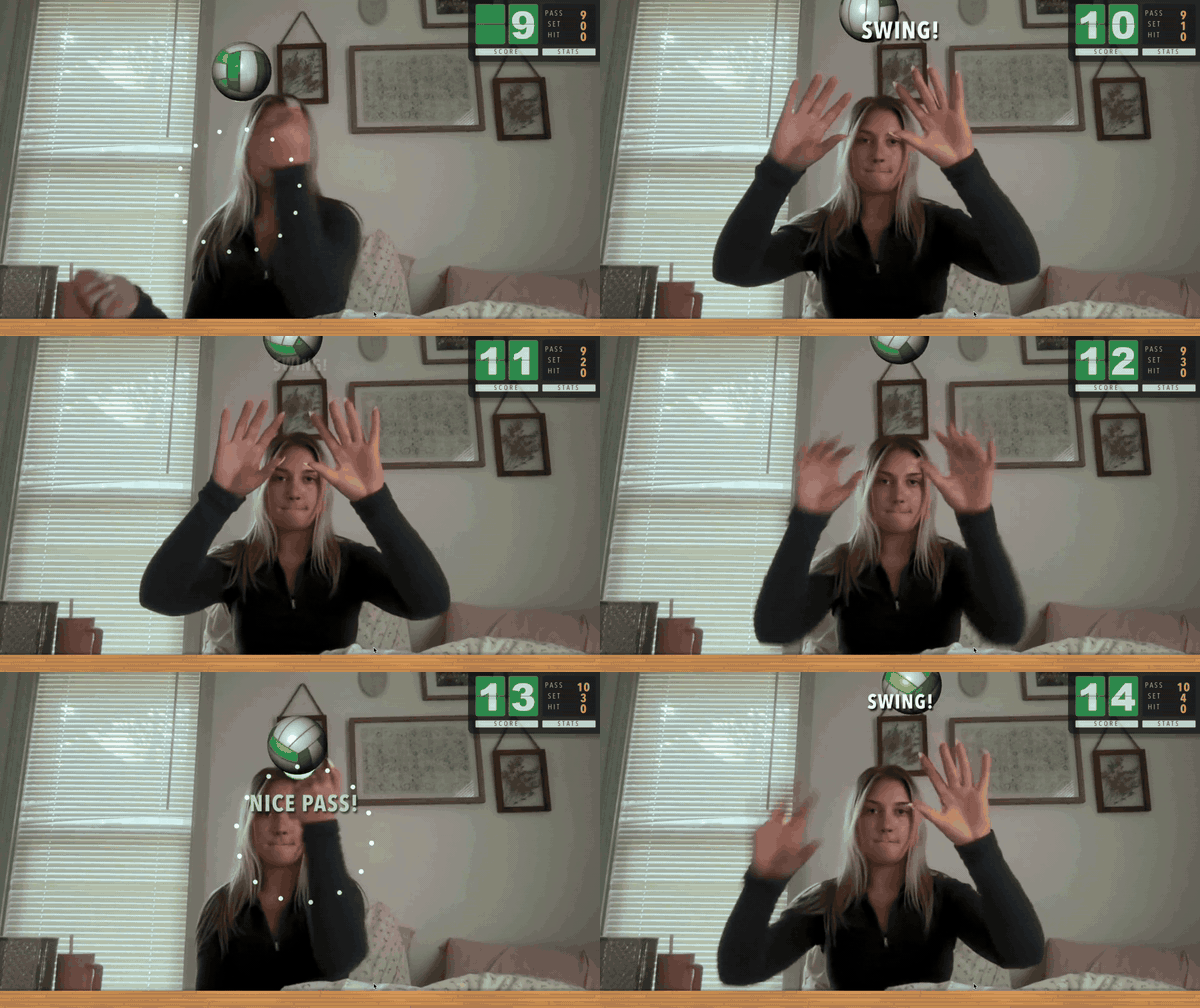
Cami made a volleyball game - a ‘keepy-uppy’ where you use your hands pretty naturally to play:
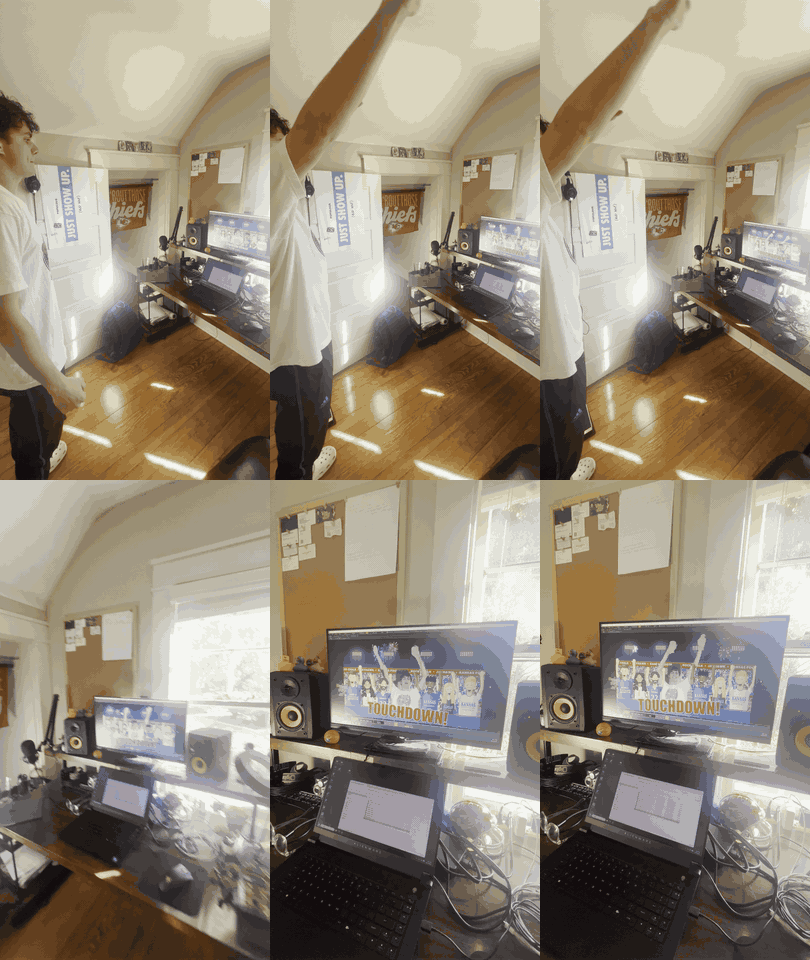
Quin had the idea to use it teach the participant how to ‘Wave the Wheat’ - the celebration that Jayhawks do at the University of Kansas when we win a basketball game or (more rarely) score a touchdown. The user naturally positions themselves in the center of the crowd, because there’s a visible space there, a natural affordance. When you raise your hands above your shoulders, the crowd starts imitating you. And when you successfully Wave the Wheat, fireworks go off and the Fight Song plays.
Saj made an abstract instrument - you don’t see yourself but you see your effect on the world. There’s an abstract multicolored sphere, and as you zoom in you can ‘pluck’ the strands of the sphere making music. (In the demo video below, the bottom-left quadrant is what the user actually sees -the other quadrants are for troubleshooting)
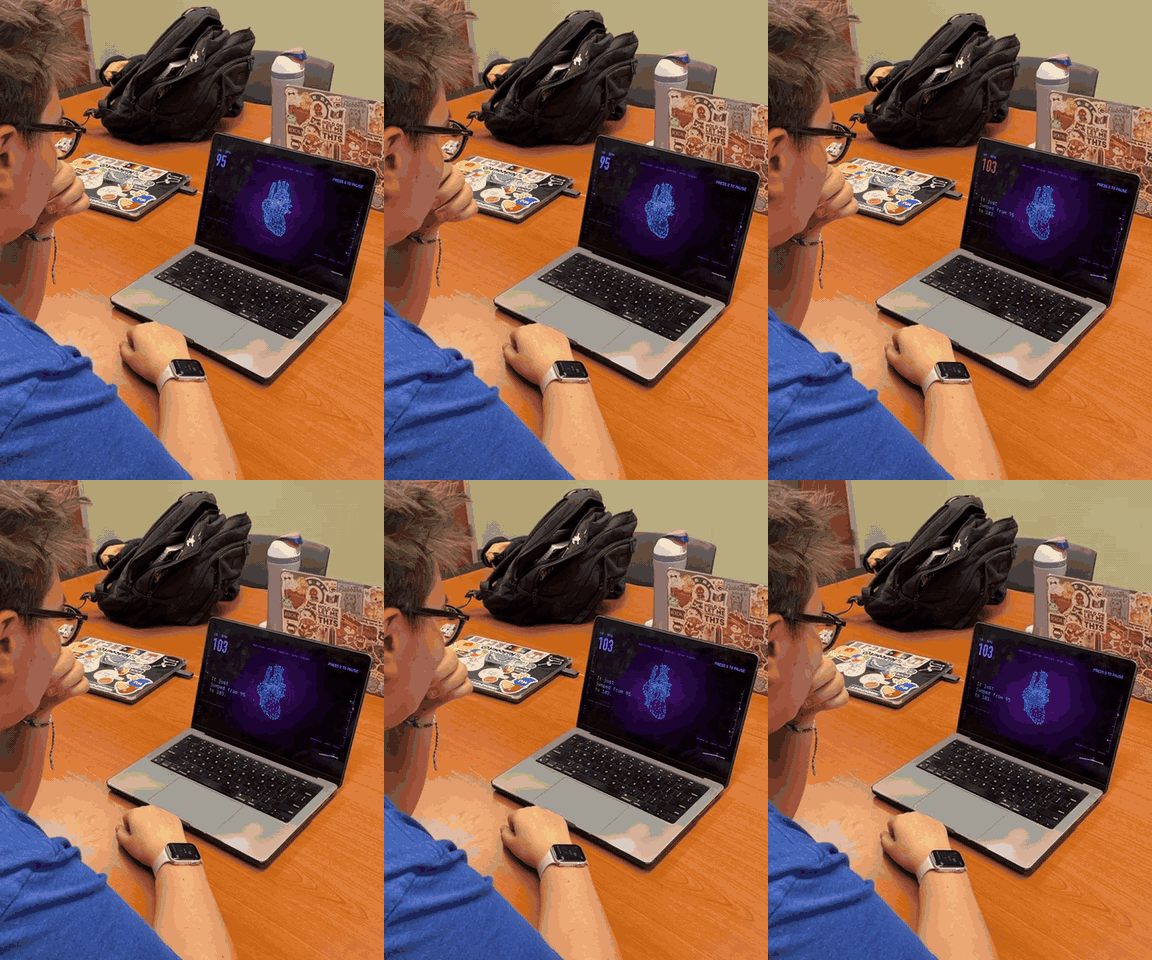
Madi eschewed visual tracking altogether, and leaned into the idea that any data source could ‘reflect’ the user. She vibecoded an app for her Apple Watch; you put it on, you see your own heartbeat reflected. Your natural urge is to try to spike your heartrate by doing jumping jacks or something… and then her tool gives you worrying stats about sudden heart failure. It’s both impressive and (imho) pretty funny.
Anyway: this was maybe the most fun I’ve had teaching a single project. I’ll definitely do it again if I can!
Bread and Puppets
Erika and I saw Bread & Puppets last night, and it was such a cool experience; writing some general thoughts and down here.
Some background: B+P is an established ‘protest puppet theater troupe’ - I believe they were started in the 1960s. They make big ‘ugly’ puppets, and put on shows. There’s now a farm in Vermont where you can go see them. And they do traveling shows, which is what we saw: some hippies on a bus come to your town, put on a giant puppet circus, serve you a bite of their sourdough bread, and sell art prints.

See! They are BIG puppets.
Last night’s show was The Upside Down World Circus. I had pretty low expectations. I believe if you want to experience cool, moving artwork, you’ve got to kiss some frogs. This was not a frog! It was so much better than I expected; I laughed, I cried, I was very very impressed.
General Observations
The puppets are ugly and handmade, but/and they have exactly the degree of polish they should have. If they were MORE polished the show would be worse.
Their whole thing is that it’s protest puppetry theater, and that art should be CHEAP. So it looks like it’s all made from stuff you could dumpster-dive for.
The show is centered around a brass (quintuplet?) + accordion + drum, which sets the whole show to music. They’re rough and loose, give the vibe of a New Orleans Mardi Gras band but with different styles.
The bus is the stage; when they are behind the bus they are ‘backstage’, and there’s a circus metaphor of ‘here’s a bunch of small acts and they’re each different’. Some bits are 30 seconds, some are 4 minutes. The music cues tell us when to be loud and when to applaud, when to be quiet.
Perhaps about 20 people running the whole thing. Lots of costume changes and different roles for everybody besides the band. The band played for 90 minute straight at least.
I really thought it was about the puppets and puppetry, but actually it was a lot of THEATER. Like: their comic timing was so good. Their pacing was great. You can tell there’s some cross-training in dance or clown school happening, but again it all felt like you and your friends could do this kind of skit at camp, if you just really committed.
Most acts used costumes where someone was on stilts, or large oversized puppets held up by poles. This worked great to elevate over the crowd, and adds to the scrappiness of this: you don’t need an auditorium or special location to do this - the audience can just sit on a flat surface and the SHOW gets taller.
The only theater-like setup was a bunch of lights; they arranged their own footlights and a couple of downlights on poles, and it worked great.
All the puppets have a very specific visual look, which I’ve seen in their stuff since the 70s. I really wonder about how the show development goes: you’ve got a ragtag bunch of artist-puppet-performers here, how do you enforce the Artistic Direction so consistently? How do you keep out the jugglers?
The older I get (and the more I teach young designers) the more I think the principles of theater are applicable to the profession. I find this difficult to swallow, given my low-key disdain for theater kids, but this is a good example: leaning into the bit helps this work. You’re making big puppets? Make them BIG puppets. How big can they get? This is the design principle I’m harping on all the time: sometimes the thing you need is just MORE MORE MORE MORE MORE.
It sure made me want to try making some stuff like it!
Chop up your books
This is my appeal to readers everywhere: you should take a knife to your books.
(And no, not in the sense that the destructive AI-scanners do.)
Like apparently everybody else, my book club recently picked out Lonesome Dove. I’m not a Western guy, but it’s clear that this pulitzer-winner earned it. It’s good.
But come on: this is an 850+ page paperback! It is what I call Too Big.
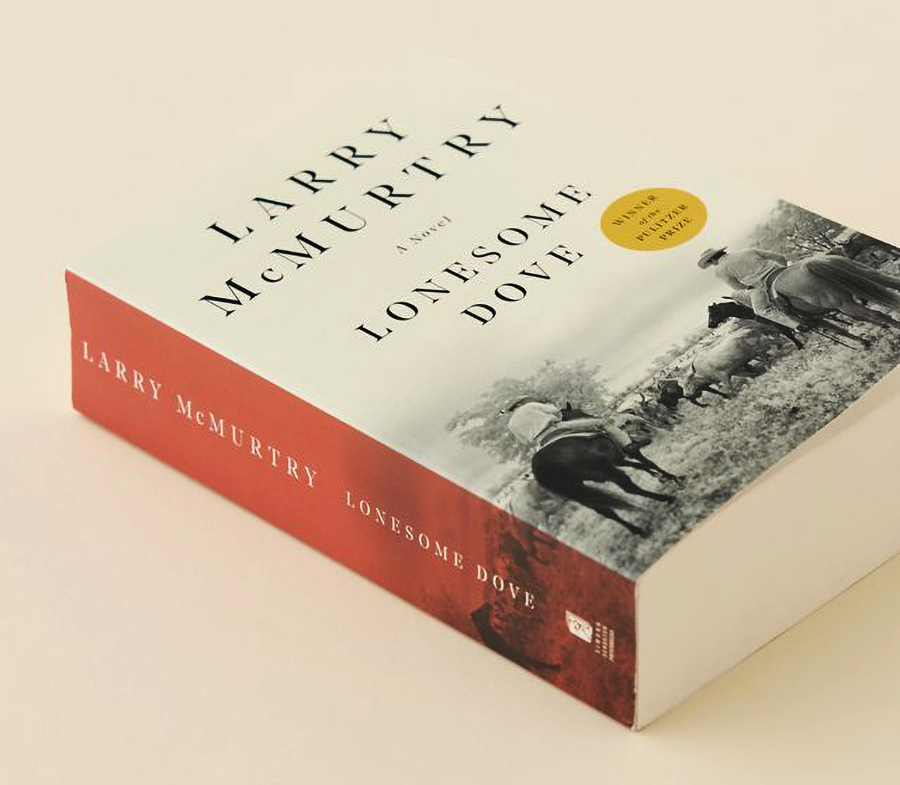
It’s going to tire out your hands to hold up an 850-page book for the time it takes to read an 850-page book. If you read in bed, it’s going to tire your arms out, trying to hold this giant tome over your head. If you want to take this book on a plane or bus, it’s going to take up half of your bag.
So, I would like to recommend you to a practice I call Chop That Book Up Into Reasonable Sizes.
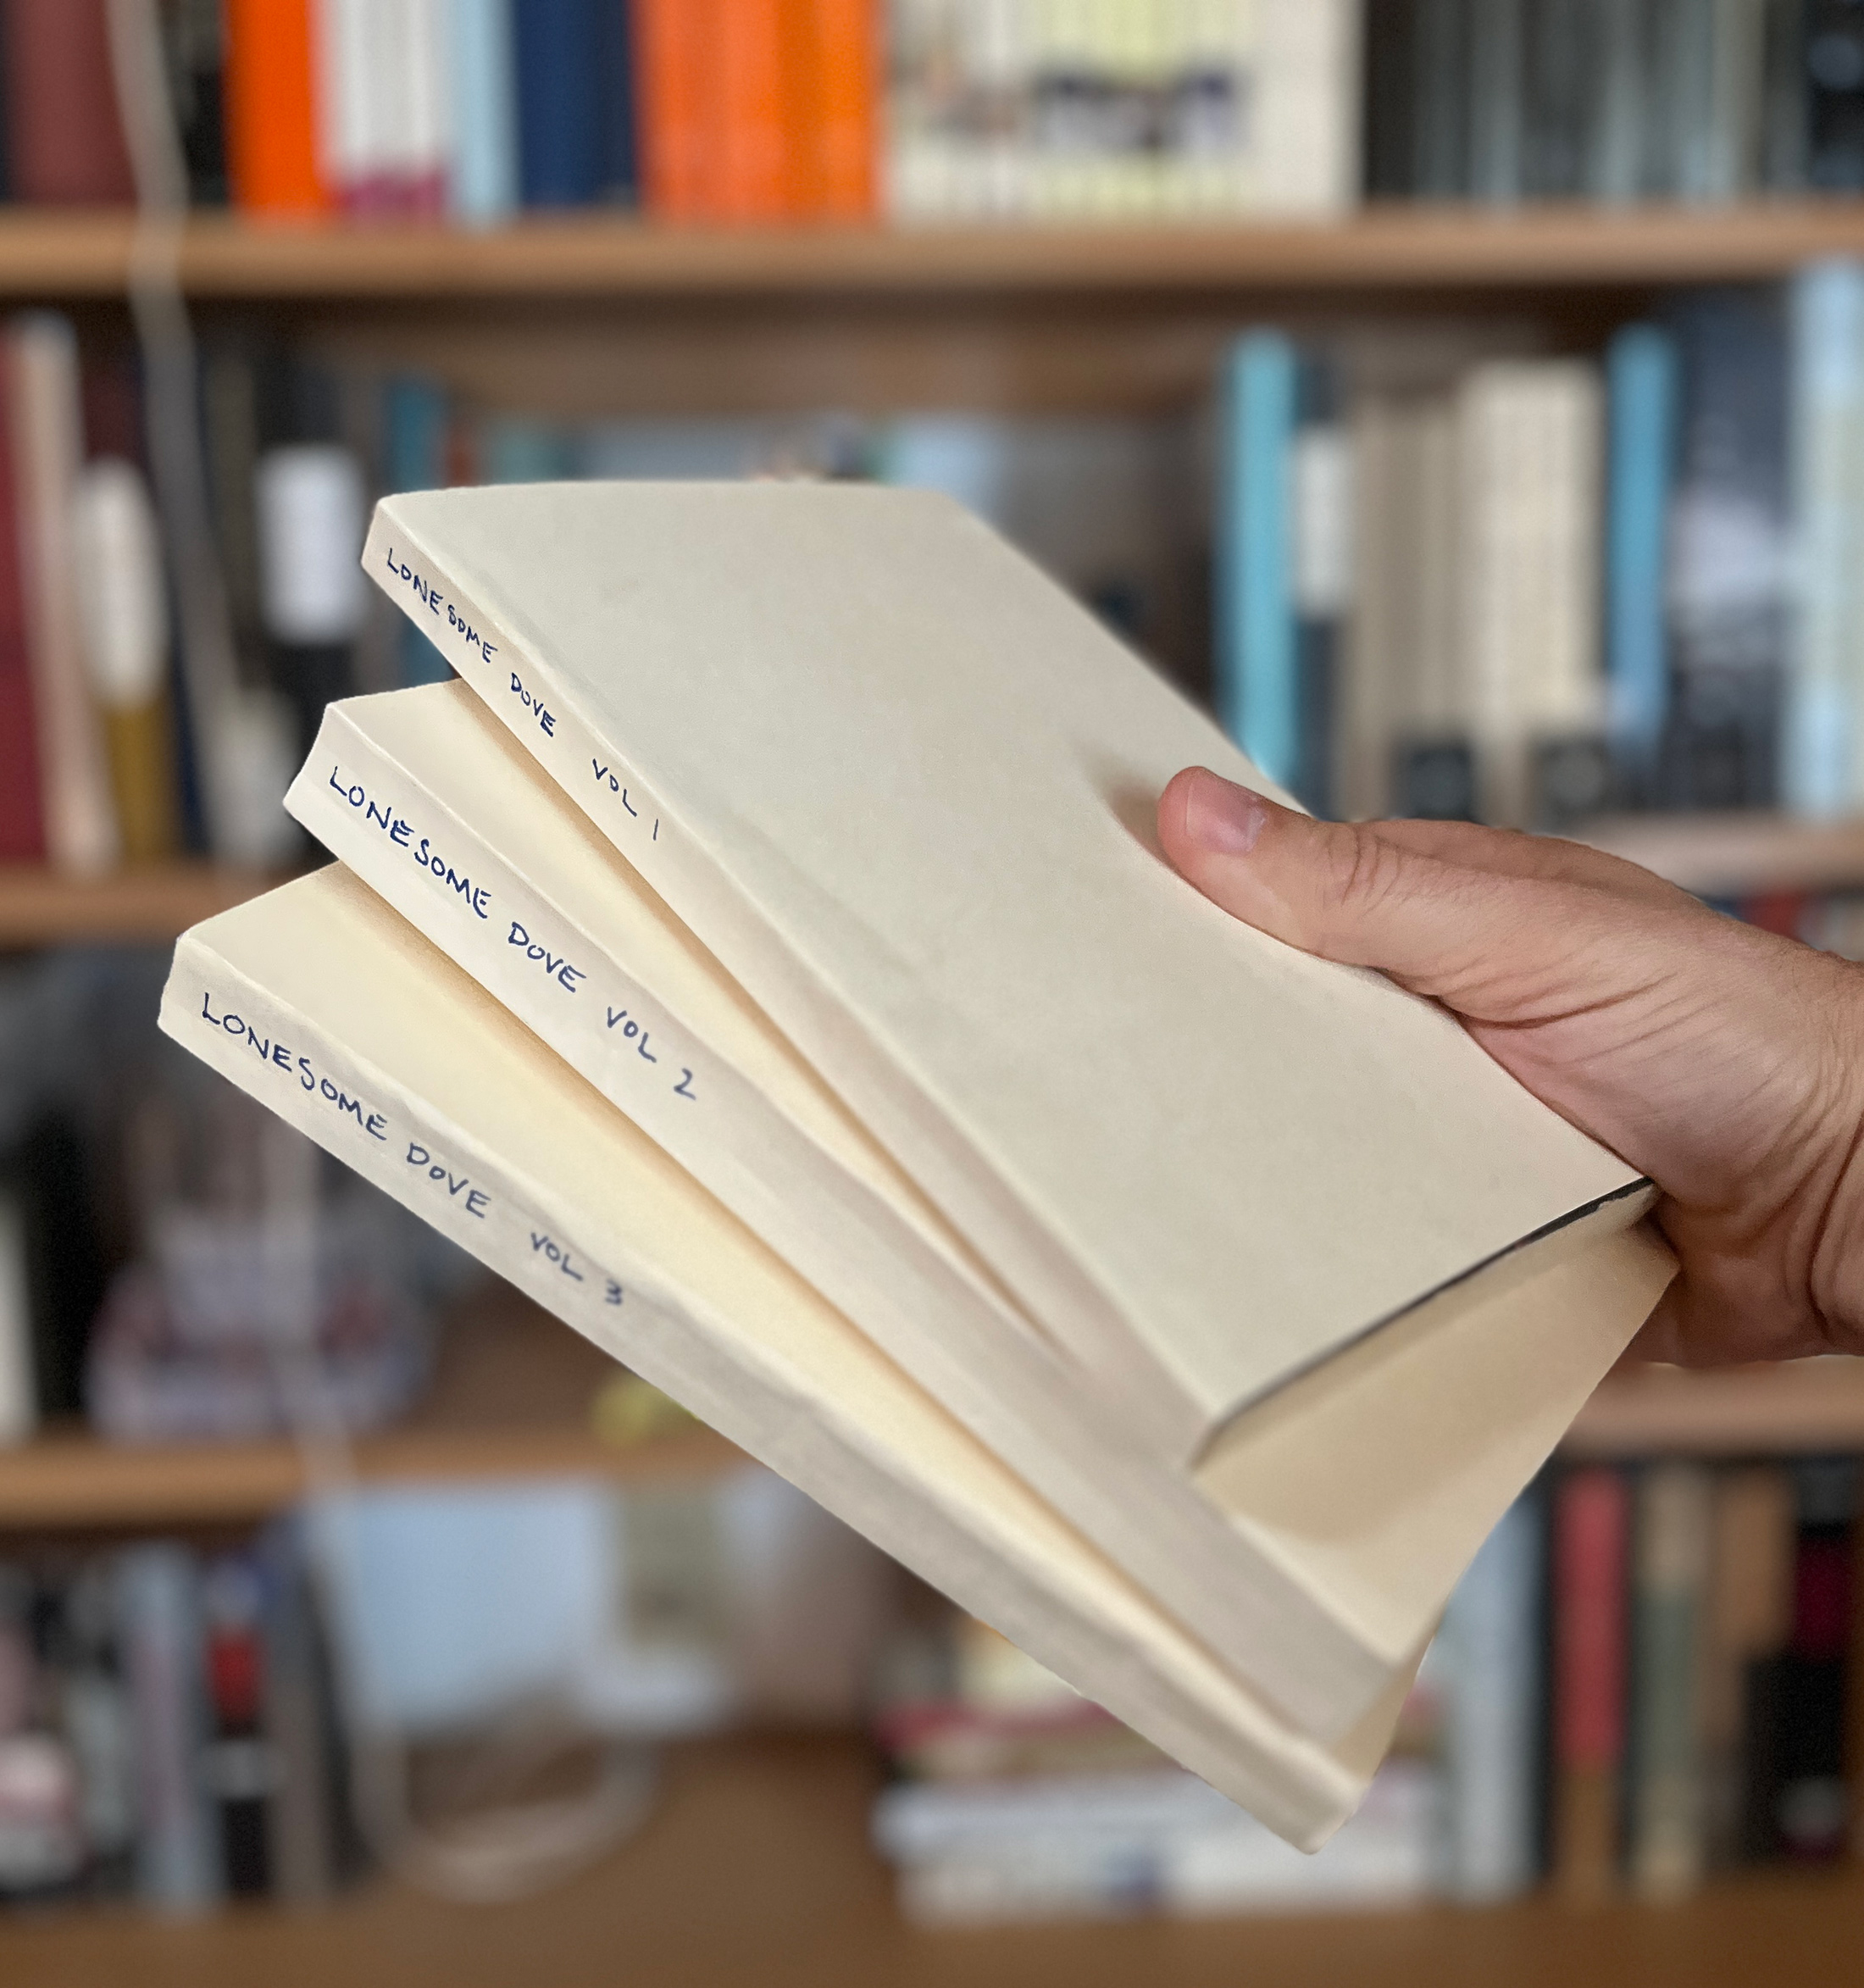
It takes a few minutes and very few tools. You also can enjoy reading reasonably-sized volumes of big books.
At the risk of parroting ‘you can just do things’, I’m telling you: You Can Just chop up your book. Nobody will call the cops. Authors don’t mind! (well, I don’t think so, and I wouldn’t mind if you chopped up my book, which I freely admit is also Too Big).
Here’s what I do when the book is Too Big:
- Buy a copy. Don’t do this with library books.
- Paperbacks are easiest but hardbacks work fine too. Think about the format you like to read and look at its pages. Do you like the type sizing? The margins?
- Find the natural break points. Lonesome Dove is a great case here; it’s divided into three Parts, and each Part makes a great smaller volume. But otherwise you’re looking for chapter breaks.
- Crack that spine. Bend the book alllllll the way open at the first break point. Manhandle it. If the book is perfect-bound (which means the pages are glued together along the spine, most paperbacks are), you can bend the spine backwards enough to see the glue strip. If you’ve got a hardback that’s actually stitched together, then look for a break between signatures (those are the groupings of pages that are stitched together). Signatures are still going to be glued together in most cases. Here’s a comparison of binding types.
- X-acto that baby. Carefully slice between the sections, right into the glue. Bookbinders glue is great stuff - you can slice into it neatly with a good sharp blade, but you won’t mess up the glue’s grip on surrounding pages.
- Voila: you have volumes. Next you’ll want to bind it in some new ersatz cover. If you try to carry around just the section of the book without any cover, you will soon learn what covers are for! Individual pages will snag, rip, and peel off. Trust me, you want a new cover.
- You can use anything, but I recommend a manila folder. These are great: firm enough to protect the book block (the actual pages), but cheap and disposable feeling. Fold a manila folder around your new smaller volume. Make sharp creases. Trim it to size with your x-acto blade.
- Then glue it on! You can get bookbinders glue, but honestly Elmers will work just fine. You’re not binding this book to make an heirloom: you’re rebinding it for your own convenience. Smear a line of glue in the new spine, and use binder clips will hold the manila folder in place. Let it dry.
- Label it! I think a bold sharpie does the job here. I’ve had books where I gave it more detail, but I love the unpretentiousness of a marker.
- Enjoy your reasonably-sized book.
On owning books
I love books.
Like, obviously. Reading is my primary form of entertainment. I work from home in a library-converted-to-office, with my desk sitting agains the only wall that isn’t covered by books.
I track my reading. I’m not keeping score; I just have a poor memory and so I like taking notes on what I read and what I want to remember.
And I do like OWNING books. I don’t shy from the physical manifestations of ownership either: they all get marked with a custom Ex Libris rubber stamp that I made in college. I write in the margins. I tape in supplemental material. I even chop up large volumes and rebind them into more convenient packages.
But I have reached a point where I am increasingly confronted with the question that plagues every book lover: why do you own all of these?
My guiding principal on book-buying used to be: only acquire it if you intend to read it more than once. That means many times I would read something from the library, and then go buy myself a copy to keep. Sometimes there’s a book I want to read for the first time, and it’s just so much easier to pick up a throwaway used copy. And sometimes, I’ll admit, I buy and keep books for sentimental or ego reasons. (There’s a shelf dedicated to ‘my friend wrote this.’)
But there’s aspirations and aspirations. When I put my hands on a book to cull the collection, I usually think: oh, I want to read this again. But I’m middle-aged! The number of books I can plausibly read again is limited, and I still love reading NEW books.
And I’m running out of space. The shelves are full. I certainly edit and discard stuff frequently, but this week I really started to think I could let a lot of these go.
Like: fifteen years ago I was interested in reading everything I could about Prester John, and collected maybe twenty semi-rare books on the topic. I enjoyed that season of reading and collection - but will I ever dip into those again? Probably not.
Or: we collected a whole bunch of young adult fiction that I loved, with the idea that they’d be available for my kids as they grew up. But surprise: the kids of two avid readers turned out to… prefer their screens? Go figure.
So: I think that editing these shelves is just going to be an ongoing process of evaluation and culling. And a bit of saying goodbye to a planned future that isn’t going to happen.
What a weird feeling.
Stealth
I’ve been working for the last few months on a new project/product, and trying to get the whole family involved. It’s an original idea of Trudy’s, and I thought it would be really fun and interesting to make it real.
Thus far it’s been a lot of organizing and planning on my side and not a lot else - but this week we’re going to an onsite facility to do a pilot manufacturing run. This feels crazy, but definitely the kind of task to categorize as ‘you can just do things.’ More details soon, but of the many reasons I wanted to try this:
- it’s a consumer product that we can sell directly
- it’s physical: it’s got to be made of real material and manufactured in a real place
- it’s local: there is a natural advantage here where we live in Kansas; there are pilot labs and material sources nearby
- it’s fun
If you read between the lines on the first three items, you might wonder: is Matt trying to AI-proof something?
Kind of? Definitely in today’s environment, the side projects that sound most interesting are ones where I can’t imagine Claude replacing it tomorrow. So it certainly makes this project more interesting.
We’ve been working on development but NOT announcing anything yet or sharing process, which is really kind of a dumb way to go about a consumer product. I think it would be smarter of us to be sharing the details on social as we go. So we’ll definitely be recording things this week - but I really need to get us to break the bad habit of working in stealth. People like to see progress!
Anyway: pilot lab day is Thursday.
